Thursday, September 13, 2012

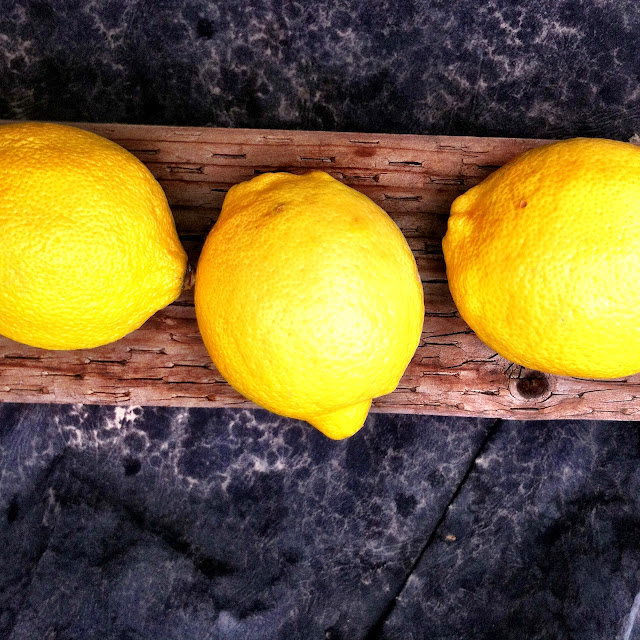
LEMON-COCONUT TOFU BARS


Lemon-Coconut Tofu Bars


Howdy Britney here!  Well one thing that you should know about me is that I am a lover of all things citrusy and tart!  And one thing I sometimes miss are lemon bars.  So when I stumbled upon this recipe I knew I had met my match.

What I love about this recipe is that the crust is savory and rich, the lemon filling is smooth and creamy.  And with hints of the lemon zest it’s a perfect combination of savory, sweet and tart.

This is the original recipe from Whole Living.

*please see my note, because I changed a few things from the original recipe. 


The Components


LEMON-COCONUT TOFU BARS

 
THE CRUST

1/2 c. coconut oil, melted, plus more for brushing
1/4 c. cane sugar
1 tsp pure vanilla extract
1/4 tsp coarse salt
1 1/2 c. whole-wheat pastry flour

THE FILLING

1/2 c. silken tofu
3/4 c. cane sugar
1 Tbsp grated lemon zest
1/4 c. lemon juice
1/4 tsp baking powder
2 Tbsp whole-wheat pastry flour

THE PROCESS

Heat oven to 350 degrees.  Brush an 8-inch square baking dish with oil, then line with parchment, leaving an overhang, and brush parchment with oil.  Set aside.  

Make crust: Stir together 1/2 cup oil, sugar, vanilla, and salt.  Add flour and stir until just combined.  Press dough into prepared dish and bake until pale golden-brown, about 20 minutes.  

Meanwhile, make filling: Process tofu, sugar, lemon zest and juice, baking powder, and flour in a high speed blender (I used my Vitamix) and process until smooth.  Pour onto baked crust and bake until set, 25 to 30 minutes more.  Let cool completely, then sprinkle with coconut flakes.

**NOTE:  Ok, so I made a few alterations to this recipe.  First for the crust I used raw sugar.  The first time I used raw sugar in the filling as well as the crust.  This gave a more caramel hue to the filling instead of a more lemony yellow color I was going for.  So the second time I used raw sugar for the crust, and cane sugar for the filling which gave the bars a bit more of the lemony yellow hue I was going for.  Also the crust was thick and was about 1:1 with the filling.  I don’t know about you but I can’t get enough of the filling so I doubled the filling to give me a better crust to filling ratio!  (I understand I probably sound ridiculous talking about crust to filling ratio, but it is important to me :)  Also I let it bake about 35 minutes instead of the suggested 25-30 minutes since I doubled the filling.  And then instead of dusting it with confectioners’ sugar I opted for some shredded coconut.  And last thing is that I like my lemon bars on the cold side so I freeze them, and then keep them in the fridge.

That's it can you say DELISH?


Wednesday, September 12, 2012

RAW FOOD: MATTHEW KENNEY & M.A.K.E !


I can't tell you how excited I am to find out that my favorite raw food chef Matthew Kenney has come to Los Angeles!  He has opened a Raw Food Academy and will be opening a restaurant in Santa Monica, California.  I really thought I was going to have to go to one of his restaurants in Chicago the next time I was there.  Maybe one day I will be able to attend the Academy.  He is the one that got me started on techniques and ideas about raw food.  His book Raw Food Real World was the first raw food cook book I really got into for raw cooking.  This cook book was the first prize I gave away for the first giveaway I posted.  I am really just beside myself.

My raw foodie friends and I can't wait to make it over to his restaurant in Santa Monica when it opens. I believe it will be opening later this month.  Check out this ARTICLE.


photos via Matthew Kenney Cuisine


 Thanks so much to The Chalkboard Mag for featuring an article about Matthew along with the fabulous Anna Getty.


Tuesday, September 11, 2012

ROASTED VEGETABLE + PEPITA SALAD WITH CRANBERRY QUINOA

Written by contributor Yumi Payne of Nastukashii.

Hello to all 'A Simply Raw Life' readers!  Thank you for stopping in.  I'm sure you've been enjoying all of the posts here as I have.  It's definitely sparked a lot of inspiration and motivation.

This salad has kind of a mouthful of a title, but I like getting an idea of what's in a dish by just knowing it's name.

Roasted vegetables are one of my favorite things to nibble on.   One of my go to side dishes is roasted carrots in olive oil & fennel seeds.  Super tasty.  Here, I added a few more things to go with...
Quinoa, nuts and seeds are always a tasty and filling addition to any salad.  All measurements are approximate.  Go with what balance you would prefer and have fun with it!

ROASTED VEGETABLE + PEPITA SALAD WITH CRANBERRY QUINOA

 
INGREDIENTS:

1 dozen carrots - sliced

1/2 red onion - sliced
1 red bell pepper - sliced
extra virgin olive oil
1-1/2 tbsp fennel seeds
salt & pepper to taste
2 medium sized zucchinis - sliced
a few dashes of chili powder
1/2 cup roasted salted pepita seeds
1/2 cup dried cranberries
1/2 cup cooked quinoa
mixed greens

Preheat oven to 425F.  In large bowl, combine carrots, red onion, bell pepper.  Drizzle with enough olive oil to coat vegetables after they are tossed. Add fennel seeds, then sea salt & freshly ground pepper to taste. On rimmed baking sheet lined with parchment paper,  spread out vegetables in even layer.   Roast in the oven for approximately 40-45 minutes or until edges have browned a bit.  

While veggies are roasting, cook quinoa per directions on bag or box.  Remove from pot.  Add a cranberries. Allow to cool.  Then, heat grill pan over medium-high heat with about a tbsp of olive oil.  Add sliced zucchini pieces in one layer.  Add salt & pepper and chili powder to taste.  Grill in pan until tender.  Remove from pan. Allow to cool.  

After vegetables are done roasting, allow to slightly cool.  In large serving bowl, add mixed salad greens, quinoa/cranberries, pepita seeds, zucchini, and roasted vegetables.  

Toss and enjoy with salad dressing of choice.


Thank you to A Simply Raw Life for having me over!

OVERNIGHT OATMEAL


I have been seeing a lot of mason jar recipes on Pinterest and on my favorite food blogs lately.  However, I really fell in love with this recipe and concept.  I try to eat mostly raw, but at times I crave something real breakfast-y if you know what I mean.  This is perfect because you don't cook the oatmeal.  I couldn't find raw oats (groats) so this time I just used organic rolled oaks.  This dish came out just perfect.  I had to pack our breakfast this past weekend and what a cute way to pack a meal.
 
 
My husband doesn't like walnuts, so I put raw sliced almonds and raspberries in his.


I tried raw walnuts and raspberries in mine.  Just delicious.  I added in a tablespoon of chia seeds that are packed with protein.  One tablespoon will give you 3 grams of protein, 6 grams of fiber, and 2.9 grams of omega-3 fatty acids.  
 
Oatmeal has great benefits as well.  Some of you may ask if eating uncooked oatmeal is healthy.  Check out the benefits of oatmeal cooked or uncooked HERE.  Whether cooked or uncooked, oats have high nutritional value and approximately 310 to 390 calories per 100 g serving. This serving size delivers 9 to 11 g of fiber and 13 to 17 g of protein. Oats are also a good source of polyunsaturated fat and monounsaturated fat, which are healthy for the heart. Although they don't pack a powerful punch in terms of vitamins, they are high in several minerals, including calcium, iron, magnesium, phosphorous, potassium and manganese. The soluble fiber in oats helps to eliminate cholesterol and lower blood pressure, and the insoluble fiber helps keep your digestive tract healthy and efficient. The beta-glucan in oatmeal can also help regulate blood sugar, and the lignans can protect the body against cancer.


I got these jars from Ikea.  These SLOM jars with lid are only $2.99.  What I also love about this recipe is that there are no set rules.  You can use any kind of milk you like, use your favorite berries, dried fruit or nuts.  Such a great little recipe! 
 

OVERNIGHT OATMEAL

 
1/2 cups oats
1 tablespoon chia seeds
3/4 cup almond or coconut milk
2 tablespoons dried cranberries
1 table spoon shredded coconut
1 tablespoon raw almonds or walnuts
fresh fruit
 
Mix the first five ingredients in the mason jar.  Cover and refrigerate overnight or at least 5 hours.  Top with the nuts and fruit in the morning and enjoy!
I have also done versions with figs, no dried fruit, with dates.  They have all been really good.  Just choose your favorite combination!
 
Bon appetit!


Oh, and here's my Instagram shot of eating this the other day on the run.  It was the perfect breakfast.


Sunday, September 9, 2012

FIG JAM AND VEGAN FLAT BREAD


If you follow me on Instagram, you could probably tell I was on a fig roll yesterday morning.  I picked up these lovely babies at my local Trader Joe's and went crazy.  They were perfectly ripe when I bought them.  I was so excited!
 
 
I ate them a few different ways yesterday and I will include some instagram pics below.  But since they were already ripe, I didn't want the figs to go bad.  So, I made a fig jam with half of the basket.  And really, it was super easy because they were already so sweet. 
 

FIG JAM 

 
For this recipe, be sure that they are ripe so you don't have to add any sweetener to it.  Wash the figs thoroughly and cut off the stems.  Cut in half and put into the food processor and pulse thoroughly.  That's it!!   This is sooo good!
 
 
I also made a vegan flat bread which we have been eating with our salads and the jam.  Super easy to  make.  I used a little corn flour in this recipe so it tastes a little like corn bread and goes well with the jam.
 

FLAT BREAD

 
2 teaspoons baking powder
1 tablespoon brown sugar or agave
1 cup garbanzo bean flour
1 cup corn flour
1 cup whole wheat flour
1 tsp salt
1/3 cup olive oil
1 cup water
 
In a mixing bowl blend together the dry ingredients.  Add the oil and 1 cup of water.  Knead by hand, adding more water as necessary to form a sticky ball.
 
Turn the dough out onto a lightly floured work surface and continue to knead until the dough is soft and smooth.  Cover and allow to rest for 5-10 minutes.
 
Preheat oven to 425 degrees.  Dust the dough lightly with flour and divide into two equal portions and roll or shape each portion into a free form round about 1/4" thick.  Place the rounds onto an ungreased baking sheet dusted with cornmeal.  Place baking sheet in the upper third of the oven and bake until crusty brown, about 15 minutes.
 
Cool, cut and serve.


Here are some of my Instagram pics from yesterday morning with figs.
 
Have a great Sunday!


Manna Bread with Almond Butter and Figs
 
Cultured Coconut Milk "Yogurt" with Figs


WARM BROWN RICE SALAD


I love these types of recipes and dishes because its super easy to make, it doesn't take a lot of time and you can make a lot and have some more for later.  I'll usually make a big bowl for dinner and then pack some for lunch the next day.  I love to cook, but there are defintely those day where you just do not have the time to spend in the kitchen.  This is is the perfect recipe for that.
 
Also, I love the fact that you can really substitute the brown rice for any of your favorite grains... bulgar, red lentils, black lentils, or my favorite black rice.  I made a similar dish HERE.
 

BROWN RICE SALAD

 
1 cup short grain brown rice, cooked
1 cup raw broccolli, chopped, or quick blanche*
1 cup raw cauliflower, chopped, or quick blanche*
1 cup raw mushrooms, sliced
1 cup butternut squash, steamed
1 cup edamames, perpared per directions
Fresh basil
2-3 tablespoons olive oil
Salt and pepper to taste
 
For these types of non raw recipes, I try to keep as many of the ingredients raw if I can.  I love the contrast between the soft and the crispness of the ingredients.

*For vegetables you don't like to eat raw, you can quick blanch them to cook them slightly and give them more greenness. Put the broccolli and cauliflower in a strainer, boil some water in a small pot. Once the water is boiled pour it over the broccolli or cauliflower, then run it through some cold water and serve.
 
Cook the rice and the butternut squash and cool to room tempurature.  Blend all the ingredients in a large bow, fold and season with salt and pepper.  So simple!
 
Enjoy!


Friday, September 7, 2012

KITCHEN: BUILD A NATURAL FOODS PANTRY


 Before
 A bit scary I must say...


After
I am loving it...


Well, this is definitely a work in progress, but I love how its coming along.  I think one very helpful change to making your life over to cooking and preparing natural foods is to have your pantry well stocked.  This year I made the decision to really focus on changing the way I cook for myself and my family.  I am focusing on eating as much raw foods as possible, natural and whole food ingredients, building a natural foods pantry, embracing more grains and cooking with an eye on color and super foods.  Early in 2011, I got my hands on Heidi Swanson's Super Natural Everyday cookbook and she has really inspired me in my cooking and thinking when it comes to food.  I love her blog as well ~ 101 Cookbooks.  She talks about building a natural foods pantry and I FINALLY starting working on it after a year of just thinking about it.

I love how my pantry is turning out.  It still needs work and it will take time, but I think the best part about all of is that you can see what you have stocked through these clear containers.  When you need to go to the market,  you can take a quick look and see what you are low on.  Before, everything was a mess and also stuffed into my pantry drawer, so I couldn't see everything quickly.  I always ended up buying something I already had.  This really makes going shopping so much easier.   There was definitely a lot of throwing out of things that were very old and things we so not eat anymore.  It's actually very liberating.

I purchased all of these containers from Ikea and I love them.  They come from two series... The 365 + series are the tall and small plastic containers which are $2.99 and $1.99 each.  The glass jars are from the SLOM series and are $2.99 each for the small and $4.99 each for the large.  Really great prices!  To stay on my weekly budget, I bought these over a months period.  But, the prices are very reasonable, so if you can afford to purchase a bunch a once, I would just do it!

I will be posting next week about our favorite grains.

So, come on everyone...let's build a natural foods pantry!
Will you join me?

Have a wonderful weekend!


Related Posts Plugin for WordPress, Blogger...