Showing posts with label Gluten Free Recipes. Show all posts

Tuesday, June 11, 2013

CURRENTLY SIPPING ON: BLUEBERRY PINEAPPLE SMOOTHIE WITH SPINACH


Currently sipping on this delicious and refreshing smoothie.  Hope your day is fabulous!

BLUEBERRY PINEAPPLE SMOOTHIE WITH SPINACH


1-1/2 cup almond milk
2 cups spinach
3/4 cup frozen pineapples
3/4 cup frozen blueberries
1/2 cup frozen strawberries
 
Blend all the ingredients in a high speed blender until smooth.
 
Optional - top with shredded coconut and hemp seeds.
 
Sip and Enjoy!


Monday, May 20, 2013

RAW CARROT BUCKWHEAT GRANOLA


One of the best things to do to continue on your raw food journey is to be sure to have the foods you want to eat on hand.  I love making raw granola so I can have it handy to take to work or have around the house for a healthy treat whenever I feel that urge to snack.
 
I love Fragrant Vanilla Cake!  My inspiration came from her Carrot Cake Granola.  Oh my! Sooo delicious.  You have to try it!  Follow Amy  for all her deliciously raw sweet treats!
 

RAW CARROT BUCKWHEAT GRANOLA

 
2 cups raw buckwheat
3 cups carrots, shredded
1-1/2 cups coconut flakes
1 cup raw  pecans, soaked for 6 hours and drained
1 cup raw almonds, soaked for 6 hours and drained, loosely chopped
1/3 cups raw agave or honey
1/4 cup raw coconut butter
1 ripe banana
1/2 teaspoon sea salt
1/4 cup filtered water
1 tablespoon cinnamon
2 teaspoons cardamom
2 teaspoons ground ginger
1 tablespoon coconut oil, melted to a liquid
 
Soak the buckwheat for 30 minutes and rinse very well.  The buckwheat will have a slimy coating.  Rinse it off the best you can and drain.
 
Put the buckwheat, coconut flakes and nuts in a large blow and set aside.
 
In a food processor, combine the agave or honey, coconut butter, banana, sea salt, vanilla, water, spices, coconut oil and 1 cup of the shredded carrots.  Process until smooth.  Pour the mixture over the granola and add the remaining carrots.  Mix with your hands and then spread  out onto your dehydrator sheets.  Dehydrate for about 12 hours or until crispy.  Store in an airtight container at room temperature for about a week. 
 
Enjoy!  It's like eating your favorite carrot cake but even better!


Join the discussion!


Do you have a favorite raw granola recipe?  We'd love to hear what it is. Please share in the comments below. Links are welcome!


Monday, April 15, 2013

RAW JAM

I absolutely love this recipe.  Three ingredients blended in a few minutes and voila!  I was recently asked by a reader and friends about finding a good recipe for raw jam and so here it is.  I took it to a party and it was really a hit!  Use it with your favorite PB&J dish (or AB&J - Almond Butter :) ) Or, as we did, make some raw vanilla whipped cream and eat it atop your favorite cracker or bread with the jam - its oooooh so good!  And don't forget my Fig Jam when fig season comes around... which is just around the corner.  I can't wait.
One thing to remember though when you make raw jam is that is fresh, so it will not last as long as regular jam.  Make them in small batches... it a treat that you're whole family will love.


RAW JAM

1 cup organic blueberries or strawberries
1/2 teaspoon psyllium husk powder*
1 teaspoon raw agave or raw honey
Blend all the ingredients together to the desired consistency.  Transfer the mixture to an air tight jar or container and let it chill for 15 minutes.  Voila, you now have your jam!  I love this jam.  It tastes so fresh you can't go wrong.
If you want it just a tad firmer, then use 3/4 teaspoon psyllium husk.
*To learn more about psyllium husk check out this link.  The psyllium husk powder asks as a thickening agent.  Only a small amount is needed.  I have also seen raw jam made with chia seeds.  I haven't personally tried using chia seeds yet, but I can definitely see how that may work too.
Enjoy!


Join the discussion!


Do you have a favorite raw spread?  We'd love to hear what if is. Please share in the comments below. Links are welcome!


Wednesday, March 20, 2013

NUTTY COCONUT CRANBERRY BARS


Many of you know that we love homemade bars here at A Simply Raw Life, this time though, I wanted to try one that was slightly different. I was inpsired by these bars I saw on Ascension Kitchen.  These looked so good and they turned out to be more versitile than I thought. Thanks Lauren!  Super delicious... Check it out...


NUTTY COCONUT CRANBERRY BARS

 
Note:  Remember that it's is preferrable to soak the almonds and cashews first and then dehydrated until they are dry to activatge your nuts and seeds, which give you added nutritional benefits.  Of course, if you don't have time or do not have a dehyrator, this recipe still works just as fine.

1 cup of raw almonds
½ cup of shredded coconut
1 cup of cashews
½ cup of dried cranberries
¼ cup of hemp seeds
¼ cup of chia seeds
¼ cup of coconut butter
¼ cup of raw honey
4 tablespoons of coconut oil
4 Medjool dates
pinch of sea salt
Zest of one lemon
 
In the food processor, chop up the almonds for a quick second to chop them into smaller pieces.  Add the coconut, cashews and chopped a little more for a few seconds.  Transfer the mixture into a large bowl.  Add the hemp and chia seeds.
 
In the food processor add the coconut butter, honey, coconut oil, dates, salt and lemon.  Mix together unitl well combined into a nice paste.  Now combine this mixture to the dry mixure and and fold it in with your hands combining it well.
 
Press the mixture well into a 8" x 8" baking dish that is lined with parchment paper and chill in the freezer for 1 hour.  Now it's ready to be cut and eaten!  Makes about 10 bars.
 
Store the remaining bars in an airtight container in the refrigerator.


I also have used these bars as grawnola and crumbled it on top of a smoothie bowl, ice cream, and fruit.  In the photo above, I topped it on my Chocolate Almond Milk Ice Cream.  So delicious!

Enjoy!


Join the discussion!

If you have a favorite dairy free ice cream recipe, feel free to share it in the comments below. Links are welcome!


Monday, March 18, 2013

CHUNKY CHOPPED SALAD WITH AVOCADO DRESSING


I just  had to share this recipe because it's so simple and so flavorful.  The simpler the recipe the better right?   I LOVE avocados and I love using them as "dressing" for my salads.  This Chunky Chopped Salad wtih Avocado Dressing is super simmple and zesty, you will love it!


CHUNKY CHOPPED SALAD WITH AVOCADO DRESSING

 
1 cup cherry tomatoes cut in halves
1 cup chopped celery
1 cup chopped brocolli
1 ripe avocado
Juice of 1 lemon
Sea salt and pepper to taste
 
Chop all the vegetables, including the avocado and place in a medium bowl.  Squeeze in the juice of 1 lemon, season with sea salt and pepper and work in the avocado, smashing them ever so gently to get your "dressing" effect.  Voila!  The lemon juice not only gives adds great flavor but it also helps the avocado from turning brown. 
 
Bon Apetit!


Join the discussion!


If you have a favorite raw dressing recipe, feel free to share it in the comments below. Links are welcome!


Tuesday, December 11, 2012

MOSTLY RAW FOOD CHALLENGE UPDATE


10 DAY FOOD CHALLENGE UPDATE

 
Well, we are going on our 8th day and wow! The support we have during this mostly raw food challenge is amazing!  The support we have on Instagram is fabulous and I love the fact that we are getting such great food ideas from each other too.  It really helps to keep us going!  Here are some of ASRL's Instagram pics.  If you are instagram, follow us or simply look up the hashtag #asimplyrawlifefoodchallenge and see what everyone is up to.


Have a great week!


Friday, November 16, 2012

FAVORITES LIST

photo via my life at playtime
 
 
Can I just say that I am so glad it's Friday!  What a busy week!  But I must say that I feel so thankful to have a wonderful life surrounded by loving friends and family!  You know who you are!  Today Thought I would share what I have been reading, craving and eating recently.
 
  • I know all of you share my Kale love.  I have to try this recipe!
  •  
  • My addiction right now. Can't get enough! And these.
  •  
  • Soup and more Soups
  •  
  • Must try this very creative recipe.
  •  
  • Loving everything pumpkin... Yes please!
  •  
  • Your mouth with thank you for this.
  •  
  • I can just smell this coming out of the oven.
  •  
  • Next on my list to make. Divine!
 
Have a wonderful weekend!


Tuesday, November 13, 2012

NO COOK APPLE CRUMBLE

 
I love the fact that in Los Angeles you can drive anywhere from 10 minutes to 2 hours (depending on where you live) and be at the mountains, the snow, dessert, the beach, wineries, or a farm.  I am bummed I missed out this year, but I've had a couple of my mommy friends who took their kids apple picking, one of them being our lovely contributor Britney.  She took her daughter Zion to Oak Glen Apple Orchard.  Also, my friend Deborah over at My Life At Playtime took her three kids over to Riley's Farm.  Check our her blog post about their excursion HERE.  Looks like so much fun!!


So, with the fall season fully in swing now here (FINALLY!), I've been wanting to make an apple dessert.  This recipe is so super simple and so delicious and can be eaten several different ways.  For all you raw foodies, this is a raw dessert.  Here's what you do...
 

NO COOK APPLE CRUMBLE


For the crumble
 
3/4 cup walnuts
3/4 cup almonds
6 -8 pitted dates
1/2 cup shredded coconut
1/4 teaspoon pure vanilla extract
Pinch of salt
In a food processor, chop all ingredients together into a crumbly, but moist texture.  Set aside in a bowl.
 
 
For the apple filling
 
6 large apples, peeled, cored, and quartered
4-6 medjool dates
2 teaspoons cinnamon
Dash of sea salt

In a food processor PULSE 4 of the apples into small chunks and transfer to a mixing bowl.
Process the remaining 2 apples with the dates, cinnamon and salt, until smooth (like applesauce). Mix both together and spread into the bottom of a 9x9" pan and then sprinkle the crumble on top.
 
This crumble by itself can be used to top yogurt, add to your cereal, topped on fresh fruit, topped on icecream... the options are endless.
 
Same goes for the filling.  I was eating the filling by itself last night. So good!  I added some to the overnight oatmeal for my husband.  You can also mix it into your cereal, yogurt or top it on ice cream.  So delicious!
 
Enjoy! 


Join the discussion!

Do you have a favorite Raw or Vegan Apple Dessert recipe? We would love to hear what it is! Share it in the comments below. Links are welcome.


Thursday, November 1, 2012

RAW CHOCOLATE TRUFFLES


I am not complaining, but I have been so busy this week.  And sometimes there are those days where you just crave something sweet.  I am seriously craving these raw chocolate turffles that I made this past weekend at The Matthew Kenney Academy.  This recipe is so easy that you won't know why you've never made these before.  And I LOVE the fact you can easily change the flavors by simply changing the toppings you use to coat the truffle.
 
Here's the rundown...for these basic cacao truffles...
 

RAW CHOCOLATE TRUFFLES


Ingredients:

 
3/4 cup cashew butter
1/2 cup agave
1/2 teaspoon vanilla
1/3 cup cacao butter, melted
1/4 cup water
1/3 cup cacao powder
Pinch of salt
 

Directions:

 
Blend all the ingredients together except the cacao powder in a high speed blender until smooth. Add the cacao powder and blend just until the ingredients are incorporated.  Pour the mixture into a bowl and place it in the refrigerator or freezer until the mixture firms up.
 
Take a small scooper and scoop the mixture and roll them in to small balls about 3/4" in diameter.  Chill until they are ready to serve. 
 
You can also roll the truffles in different flavor toppings to add that next level of flavors.  If you would like to do this, have small bowls with your toppings ready so you can roll the truffle in them and then chill until serving.
 
Here are some ideas of flavor mixes you can use:
  • Pistachio , Salt, Cardemom
  • Cacao nibs, Cinnamon, Coconut Sugar
  • Cacao Powder, Maca Powder, Cinnamon
  • Pumpkin Spice, Cayenne, Cinnamon
  • Cacao Powder, Cayenne, Sea Salt
  • Pumpkin Spice, Ground Ginger
 
There are so many other flavors you could blend and use, the sky's the limit.  I am sure you will find your favorite.  Mine was the Cacao Powder, Cayenne and Sea Salt.   I think I need to pick up or make some lemon salt for this recipe.  Lemon salt, cacao powder and cayenne for a little spice kick sounds awsome!
 
Enjoy!


If you are interesting in trying more of Matthew Kenney's recipes you should definitely pick up one of his many fabulous COOKBOOKS
 
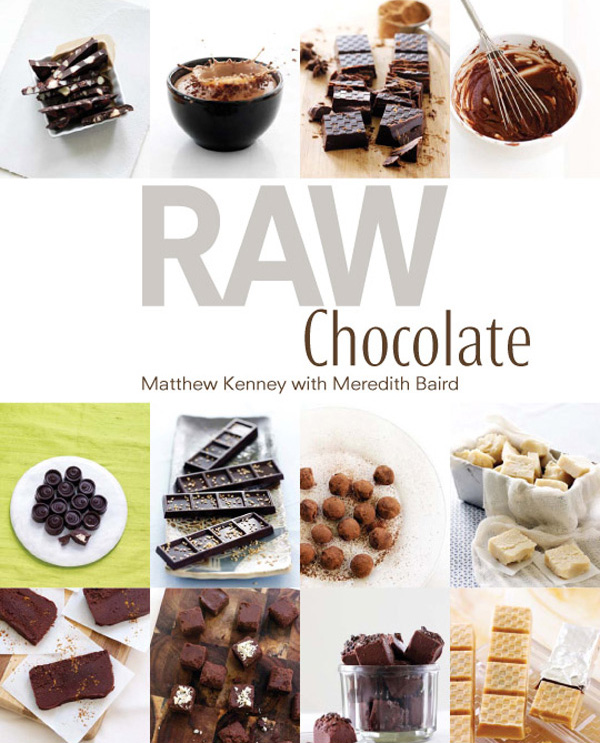
You can find other delicious raw chocolate recipes in his Raw Chocolate cookbook too.


Join the discussion!

Do you have a favorite Chocolate Dessert recipe? We would love to hear what it is! Share it in the comments below. Links are welcome.


Tuesday, October 30, 2012

SUSHI RICE SALAD


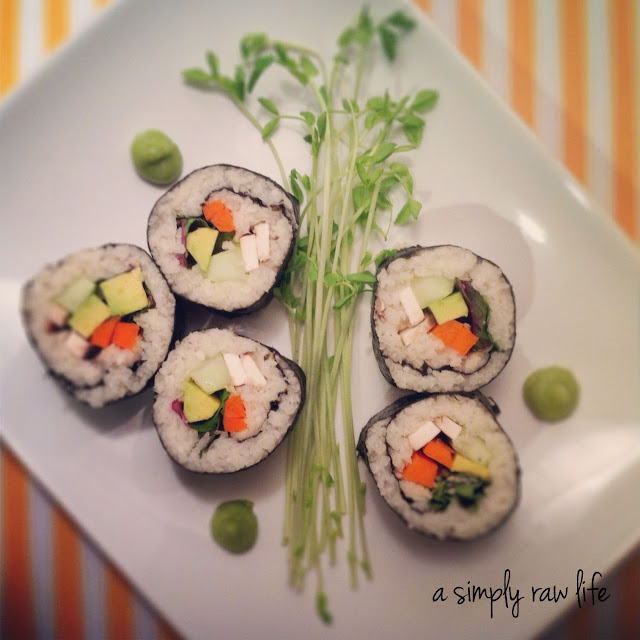
You may have seen my raw sushi and vegan hand roll post yesterday on Instagram, which was very tasty by the way.  I didn't have quite enough time to take tutorial photos of the sushi rolling process, so unfortunately, I will have to do a post on that another time.  But, as I was rushing to pack our lunches this morning I said "Ah ha!"  Of course, I will use the left overs from last night to make a sushi rice salad.  Perfect.  You can do this with the acutal sushi rice as well to make it vegan.  Super easy and super yummy!  I love these simple Japanese inspired dishes that are healthy and full of flavor.
 

SUSHI RICE SALAD

 
To make the jicama rice, take 1 medium size jicama and peel the skin off, cut them into small cubes, and process them in the food processor until you have small rice like pieces.  Then put the jicama in a cheese cloth and squeeze all the liquid out of the jicama.  Put the jicama in a bowl and season it with 2-3 tablespoons of sushi rice vinegar and set aside.
 
Julienne cut your favorite vegetatables to top the rice salad and season with a mixture of wasabi and your favorite type of  "soy sauce".  Finally garnish with cut nori strips and sesame seeds if you have some.  Super simple.
 
Enjoy!


Sushi Rice Vinegar


I will be working on a post for these soon...


Join the discussion!


Do you have a favorite Sushi recipe? We would love to hear what it is! Share it in the comments below. Links are welcome.


Friday, October 19, 2012

RAW VEGAN: MEXICAN SEASONED VEGGIE MEAT


Obviously, we like tacos over here, so I was very happy when I found this recipe from Judita Wignall in her book Going Raw.  This tastes so good and very much like taco meat that you won't even know the difference.  I love Brazil nuts too so, this recipe is a winner!  My husband couldn't get enough!
 
We wrapped this and all the fixings into a large rainbow chard leaf to complete our raw wrap.  So delicious! 
 
rainbow chard

soak and process the brazil nuts
 
mix the brazil nuts and veggies together


Here's the recipe...
 

RAW VEGAN MEXICAN SEASONED VEGGIE MEAT

INGREDIENTS:

 
2 cups brazil nuts, unsoaked
4 cups finely diced zucchini
1-1/2 cups  minched white or cremini mushrooms
1/2 cup minced onion
1/2 cup minced celery
1/4 cup mexican chilli powder, you can add up to 1/2 cup to add more flavor depending on your taste
1/4 cup lemon juice
1 teaspoon sea salt, less if you are using salted chilli powder
2 clove garlic minced
1/2 teaspoon cayenne pepper
 
Julienne your favorite veggies to include into the wrap.  I used yellow bell pepper, carrors, tomatoes, guacamole, pea shoots and cucumbers.  You can also add shredded cabbage, spinach or romane lettuce. 
 
For the veggie meat, place the brazil nuts into a food processor and grind into a flour.  In a large bowl, combine the brazil nut flour with the zucchini, mushrooms, onion, celery, chili powder, lemon juice, salt, garlic, and cayenne.  Spread the mixture into 2 dehydrator trays lined with non stick sheets and dry at 110 degrees for 1-1/2 hours.  Transfer to mesh dehydrator sheets for another hour.  Do no over dry.  Fill your tacos or wrap and serve!
 
If you save your meat for later and want to warm it up, place the the meat in the dehydrator for 30-60 minutes at 145 degrees before assesmbling.
 
Enjoy!


Related Posts Plugin for WordPress, Blogger...